There’s nothing wrong with purchasing a standalone kegerator but we all know that’s not good enough for you, right? If you’re looking to build your own DIY kegerator out of a mini-fridge, we’ve got a perfect kegerator tower conversion kit for you that features all the parts and components you need for the project.
As one of the leading distributors of beer equipment, Beverage Craft offers a wide range of draft tower kegerator conversion kits for your draft beer and homebrewing needs.
Tower Kegerator Conversion Kit: What’s Inside
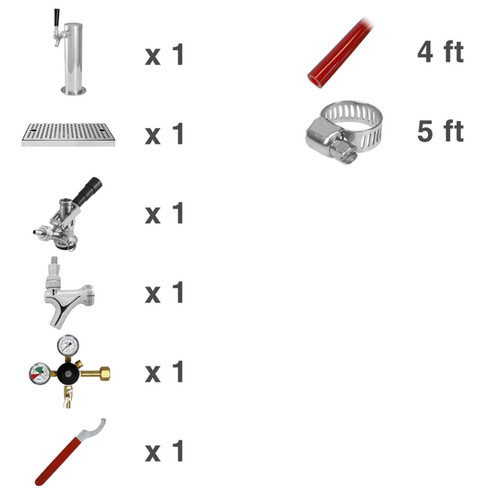
This includes the following parts and components:
- Primary CO2 regulator (60 PSI, by TapRite)
- Domestic faucet, polished (stainless steel)
- Keg coupler, D-type (stainless steel)
- American style 3" cylinder tower, 1 Tap (stainless Steel)
- 5 1/8" shank with 3/16" bore & nipple (stainless steel)
- 12" x 7" countertop drip tray, no drain
- 4ft of 5/16" vinyl tubing
- 2 of 5/16"-3/8" SS gear clamps
- Red faucet wrench
Please note: this kegerator conversion kit tower does not include a CO2 tank but you can always purchase one easily from Beverage Craft. Browse our selection here.
Using a Conversion Kit to Build a Tower Kegerator
First off, you are going to need a mini-fridge - not necessarily a new one. Any used mini-fridge that’s in good, working condition will do. Second, you need to get a kegerator conversion kit from Beverage Craft (a no-brainer!).
Finally, a CO2 tank filled with CO2 - they are shipped empty so you will have to get it filled at your local welding supplies store or brewing equipment store.
Once you have all of that, here’s what you need to do:
- Remove all the shelves from the fridge
- Using a hole saw, drill a hole through the top of the mini-fridge to run the beer line from the keg(s) to the tower
- Mount the draft tower on top of the fridge drilling four small holes for screws to go into
- Attach the faucet and tighten with a spanner wrench
- Attach the beer line to the back of the shank
- Attach the air line to the nipple on the keg coupler and the one on the regulator
- Attach the gas regulator to the CO2 tank
- Open the CO2 tank and attach the keg coupler. Adjust the pressure to 10-12 PSI and turn it on
This is just one of the ways you can build a DIY kegerator using a Beverage Craft kegerator conversion kit. For more useful information and homebrewing tips, be sure to check out our blog.
If you haven’t found an item or part you are seeking for don’t hesitate to contact our managers on email sales@beveragecraft.com to inquire about the availability. We have new arrivals each week and are always here to help.


